Tuesday, December 16, 2014

Zondle as a review tool

One of my teachers has truly embraced the technology at our school and has brought me some great ideas.  One of them is zondle.  I had never heard of zondle, but when she showed me what it is and what it can do, I was really excited about the ways a classroom teacher could use it.

Once you create a free account (and you can also update to a premium, but the free has a lot to offer), you get a long list of things you can work with.  You can create classes, add users and monitor your students.

Some of the things I like about it:
1.  Sharing components-  You can create content and share it with staff members in your school. Why do the work twice?
2.  Teaching mode and playing mode-  You can use it to both introduce the material as well as review it for "zollars" (Zondle points)
3.  It's mobile!  You don't have to use just a computer.

There is so much more about this, it's worth dabbling into to see what you can do with it in your classroom.

Tuesday, December 9, 2014

Using Kahoot in the classroom


One of my staff members has been very busy using an app to keep her students engaged.   I had the chance to use it myself, at a conference over the summer, and I can see why kids enjoy using it as a review tool.

It's called Kahoot and it is a free website taking place of that old school powerpoint we had back in the day, but it is very interactive.   Have you ever gone into a restaurant and played the question and answer game with the people around you?  You get a question and it times down adding more info as you wait until you ultimately see the final answer?  That, my friends is Kahoot!

Kahoot allows for question/ answer creation in the form of multiple choice.  Teachers can input questions that relate to the specific topic and it generates an online quiz.   The audience chimes in via their phones, computers, tablets, whatever.  They simply get a code for the kahoot you are using and join in.   The game launches and it runs through.  Teachers get instant feedback from student responses.   The timer ticks down once the question starts and the first to answer wins the most points and it goes down to the last respondent.  The final results determine the winner.

A few of our teachers have been using this with a great deal of positive results.  The kids love it and the teacher is getting very quick feedback about what needs re-covered and what is mastered.  It is a quick and easy tool to use.

Tuesday, December 2, 2014

The Library Maker Space


This school year brought about a lot of changes to our school and our library.   We migrated our SMS to PowerSchool from SDS, we got an almost new administration and we have a lot of new staff. Why not add something new to the library as well?  We decided to make a maker space in the library.  It's the ideal way to get kids to come in and visit, and it allows for some release from the norm of a tedious school day.

We were fortunate enough to have some money to use to buy tools and supplies for the space.  I wanted student involvement as much as possible as well. I created a survey with some potential ideas for the space.  We included things teens like to do and also added some stuff that we like. (After all, who doesn't love to play with Legos?)   We sent the survey to the student body and learned the following:

Duct Tape crafts are a HUGE hit.  Almost all of the kids who responded wanted to be able to make duct tape crafts.  They may be a little pricey, but we decided to float the project options week by week so we can make the tape last longer.   We also learned that origami is a classic favorite.   A lot of kids wanted to be able to come in and make origami.  The Legos and computers were a no brainer. Legos are awesome so we had to have those and for the computers, we updated all of our devices and had 150 Windows XP computers, so, we grabbed a few from the recycle pile and ordered a computer tool kit.   Amazingly enough, the computer tear down/ rebuild station is the hottest in the library!  One thing we did do was add a book that relates to the topic.  We have a Lego book with ideas, an Origami guide or two, and some duct tape craft books.   We aren't letting them circulate.  They will remain in the library with their respective kits. 

Aside from the maker space stuff, we also have some games we added last year:  Chess, Checkers, Apples to Apples, Life and Risk.  Kids love to play games in here so adding them was a wise choice.

It's exciting to see kids come in and ask to do crafts and play Legos.  It makes our day.


Tuesday, November 25, 2014

Quick ways to publicize the library

It has been a while since I have posted, I have been so overloaded doing our PowerSchool migration that I have really had to put my blog on the back burner.  I am hoping that I can start back up.  One of the things I have been doing between data cleaning and importing is library publicity.   In Indiana, we are required to create a Student learning Objective, which for a library media specialist is a challenge. How does one who doesn't teach kids directly handle that?  I decided to focus on increasing library visits by students.   Last year, I averaged 1780 visitors a month.  My goal is to increase that number by ten percent.   Here is how I plan to see that happen.

1.  Maker Space:  We had some money left over in an old account so we bough some duct tape, legos, and origami. We also got new computers so I snagged a few old ones from the pile to recycle and added those items to the space as well.   Though we aren't functioning yet, we are ready to go. Kids are already asking when they can come in and make crafty things.  It is super exciting to see the kids interested.

2.  Postcards:  I started sending email postcards with little tips, facts and ideas to all of the students from time to time.  I wanted them to see what was happening in the library.  I put little tidbits about book orders, new releases, surveys and things we can do for them.   I am not sure how many kids read them, but I do get some replies.

3. SMORE:  I started making a newsletter to share with staff (and sometimes students) on SMORE.  I got inspired by a fellow Hoosier librarian who started doing this.  I add some info about what is hot in the library as well as a tech tool that can be used.  The newsletter comes out once a month and is mailed to all teachers and students.

4. Posters:  I make posters about very important topics and scatter them around the school.  We have a color printer so I print them in color.  Publisher is my platform of choice for that, or even PowerPoint.  Both are simple.  I take the poster and do a screen clipping of it and make it an image and put it on facebook.

5. Social Media:  Last but certainly not least:  I post everything I do on social media.  Twitter, Facebook and sometimes Pinterest.   I even post videos of all new releases on Animoto to YouTube. Then I share them on my school library blog.

If what I am doing doesn't hit a few people, then I am not doing something right.  I have already seen an increase in visits and library usage and I know a lot of it is in part to the numerous things I have implemented to publicize the space.

Wednesday, November 5, 2014

From the Archives: Personalized PD: Twitter

Often as educators, we are called to a staff development and hear about the newest trend, data that pertains to a small group of people and very irrelevant to others.  Yes, learning about math data is important to the staff as a whole, but, if there was a way as a teacher we could grow personally and develop our own PD, I think we as a whole can become better educators.

There are many ways, as educators, we can personalize our staff development and these are the ways you can do it:

Twitter:
If you are not on twitter, you should be.  Twitter is by far one of the most powerful ways to learn and grow as a professional.  If you spend 10 minutes from time to time glancing and reading what people post, you will learn something new.  I had a teacher ask me for some insight to a topic.  I went to my twitter, posted a quick question and in a matter of five minutes, I had close to 10 responses with suggestions.   WOW!  Who would have thought five years ago that something that powerful would be available at our fingertips.  (For more information about personalizing PD with twitter, please check this link and read this material.)  Select a few hashtags (#) and watch them from time to time.  There are a lot of programs that allow you to follow the chat, some even allow for an archive so you can go back and see it later.

Here are some fantastic education chats and links to places you should visit to learn more about twitter for education:
The Cybraryman:   This site is a plethora of information for everyone in education.  The link here is for Twitter and it includes a lot of informational pieces for you.  He has established a schedule of all of the education chats out there and the times. (PLEASE DON'T BE OVERWHELMED) There are many of them, but only a few may pertain to your needs.

Here are the ones I personally attend from time to time:
#edchat  (Tuesdays at 7pm)  Lots of fantastic ed topics.
#INeLearn (Thursdays at 8pm)  Directed by IN-DOE department of eLearning.  Excellent source of information.  Topics vary weekly. (Every state has their own, I follow Indiana's since I live in the Hoosier state.)
#edtechchat (Mondays at 8pm) Focus on educational technology.

Are you looking for some people to follow?  Everyone listed here are a good start of who should  be followed on Twitter.  As you follow these folks' posts, you will see more people to follow.  If you are looking for content specific people, ask it on Twitter, someone will help you.:
Jerry Blumengarten                                             edweb.net
ISTE                                                                 Kimberly Munoz
Edtechtalk                                                         Sara Hunter
Angela Maiers                                                   Larry Ferlazzo
Matt Miller                                                   
Michelle Green
George Couros
INeLearning
Chris Casal
Connected Educators Project
Shelly Terrell
Edudemic
Will Richardson
Kathy Schrock
Adam Bellow
Pam Moran
Richard Byrne
Erin Klein
SimpleK12


Thursday, October 9, 2014

I am back, Hopefully

At long last, I have some time to revisit my blog and write a little.  I have spent the last five weeks of my life Power-Powerschooling.  I have done what normally takes six months in the course of five weeks.  Still not done, but better along than I was a while ago.   I am still thinking about things I can use with students to make technology integrate better into our 1:1 school.   I have found some awesome things and I am starting to process what I need to look at and get it organized to share.  I hope to be back next week with my first official post of the school year.  I may be down to one post a week for a bit, until I get this Power School migration done.  (Who knew there would be that much DATA???)  But, I am close enough to being done that I can start my posts again.

Until next week.

Sunday, September 21, 2014

Missing in Action

It's been a few weeks, almost two months since I have made my last post. I didn't know when school started I would be in charge of a migration to PowerSchool. Who knew what that would undertake. I am only half way done and feel like I have learned more about excel than I ever imagined but it's been interesting.
So, my point is this, I am incredibly behind with my blog and my regular work so until this migration is done, I am pausing. I have gone through past posts and picked some for repost. I hope by mid - October the migration is done and I can get back to normal.

Tuesday, August 12, 2014

Welcome back: New Look in the Library

This summer, my library assistant and I spend several days moving shelving around the library to make it a more open space. We felt a need to make the entire library visible for the library staff and more accessible for the students.

We started by moving the shelving from the center of the library into one space near the circulation counter. All items in that section are non fiction.  We can see down every aisle.  We placed shelving against the wall on the exterior and made that the fiction section.  We have a few single shelves popping out here and there, but for the most part, the entire area is open. 

I decided to make a panoramic Thinglink of the entire space so students can see where everything is located. We also made a great deal of signage to place around the books to show kids where they are and what they find there.  I am truly excited to get the kids in here and get the year going.

We moved the tables around to different spots in the area to make collaboration centers and work zones. We also remodeled the coffee shop as well.  It is no longer behind the circulation counter, but it is now in my office.  I gave up the space because I seldom use my office, I prefer to do my work in the library around the kids and staff.

The final outcome is amazing.  The room looks like a new place.  I am excited to see what the kids say when they come back and walk in the first time.  The Thinglink will be available after school gets started.  We are going to have to move some of the books around and when that is done, we will have exactly as we wanted.


Friday, August 8, 2014

Sites for Writing: Hemingwayapp


Have you asked students hand in  a paper with both active and passive voices, incorrect usage of adverbs, and maybe some long sentences that could be split?  There is a website out there that evaluates your writing and helps determine readability, voice and complexity of sentences.  It is Hemingwayapp.  I learned about the site at my TLC training and I see it having a lot of purpose for staff to get kids to write to their potential.

Often, a paper students hand in a paper with sentences that don't make sense and are difficult to follow.   With this program, you copy the text you are working on from your document file and paste it in the app.  Click a button and it determines what the writer needs to make it a better document.  It is also an easier way to count characters and words for those papers that have a minimum length.

I think teachers of all content areas would benefit from using this app.  It will also help students become more fluid writers.  It is a simple step to add to the writing process.

Tuesday, August 5, 2014

Using Videonot.es to Flip

As I was taking my training for technology leadership certification, I was introduced to a site called Videonot.es.   I learned quickly that a teacher who is flipping a class, or who wants to script can use this program and pull videos from YouTube and Khan, just to name a few.   A student who needs extra help can use this quickly and efficiently to create great notes for themselves.   
One thing I really like about this is the link to GoogleDrive.  Anything you create saves in your Drive to be used later for more reference.  If you are in a class that has a comprehensive exam, you can refer to these flipped videos as a study tool. 

It could be used by numerous grade levels, even staff could use it for professional development notes.

When we did our training for TLC, we used this site to take notes and it was very helpful and useful.  I can see a teacher who is trying to flip a class use this to be very successful. Kids can benefit a lot, and if you are in a GAFE school, it's even easier.   I suggest you look into it.

Friday, August 1, 2014

Cool presentations: Animoto

As a library media specialist, part of my job is to make my patrons as aware as possible of everything I can about the library at my school.  I make a lot of videos for the teachers and students about everything.  I make tutorials, new release videos and videos about what we have for them.   One program I use often to make videos is Animoto.  I have learned that Animoto is awesome and easy and I use it weekly to make my new release videos.  It's fast and fun and I think every teacher out there should know about this program because you can put together something for any class.

Animoto sets images and text to music.  It contains a set of royalty free music, simple text inserts and the capability of linking to several graphic sites and storage sites (such as dropbox and flickr.)  I have learned, too, that teachers can get a free educational account that allows for longer videos (the typical free video is 30 seconds, but with the educational version, the videos are as long as the songs you choose.)

It's very easy to use and the fact that the end result can be exported to YouTube.  I embed the YouTube videos right into my library blog.  I also post the links to the school Facebook account so the videos reach as many people as possible.  I love how simple the program is to use.  It doesn't take much to learn and every teacher can put this into their bag of tricks and use it to make something awesome.

Tuesday, July 29, 2014

Presentations without PowerPoint: Powtoon

Someone posted an article about tools that can be used to as a means of establishing a presentation. Powtoon was one of the sites listed.  I had to check it out.  I LOVE it.  I have finally found a free site to make really nice, crisp presentations that can be published directly to YouTube, and it's really easy.

I created my free account, which can link to Google+, Facebook or LinkedIn.  You can also use an email account to establish it.  It has you determine if you are a student or a teacher, which I liked.  I established a teacher account, so I am not sure what appears on the student side.  I made a quick thirty second presentation in about five minutes.  It was easy and there were a lot of options available to make a nice slideshow.  It was quick, simple and definitely something I would use again to make some slides for the library.  I can use it for tutorials, new release videos (I use Animoto now, but maybe I can mix it up and use this as an alternative.) I think the kids would enjoy seeing the presentations and would benefit from them.

I have a few teachers at my school who have students do PowerPoint presentations.  I am going to share this option with them because I think the kids will enjoy the many options it has to offer.  I also think the teachers will enjoy seeing the presentations because they are different than the same old same old.  I think the teachers will appreciate its ease of use and the students will be able to figure it out without a lot of help.

This is a very simple, free product for the kids and staff to use.  I hope some of them try it out.


Friday, July 25, 2014

Presentations without PowerPoint: Thinglink

For years, PowerPoint has been the go to program for making presentations, but, there are many other programs out there that can be used to make presentations, Thinglink is one of them. I decided to build a virtual library with Thinglink and identify all of my genre sections and share what sort of materials are there.

A colleague shared that her teachers are using Thinglink to do interactive presentations about Historical events.  Thinglink lets you embed video, text and more images.  It's accessible by a simple click of a button. The educational version, which is free, actually lets teachers establish groups and add students so kids work is within the teacher's channel.  What a fantastic opportunity to change up your presentations.

Imagine this:   A teacher does a PowerPoint to present a specific topic.  On that PowerPoint, there is a video, some text, some images and a timeline.  Wouldn't it be awesome to embed a Thinglink into your website that contains the same information and let students refer to that?  You can even embed a worksheet or a project into the actual image.

I can see Thinglink being used for all sorts of projects- There is so much that can be done with it. The images you see here are the featured links of the day.

Tuesday, July 22, 2014

Presentations without PowerPoint: Piktochart


Part of being a Library Media Specialist is the need for infographics and presentations to share with staff and administration.   I have discovered that piktochart is an awesome way to make really nice infographics and presentations alike.

A colleague of mine made a series of presentations to share with her staff using this program.  They were nice and very user friendly.   It's a fast way to present any form of information.

Because it is an infographic, it could be used also to share data.  It doesn't have to be just a presentation.  There are a few options, presentaboard, an infographic, a report and a banner.

The final look can be shared in presentation mode and share the entire document with a group.  I have seen a few other LMS use this program to make documents to share with the powers that be.
I am going to start using it as a means of sharing data with my staff and my students.  The presentations look really nice and they are so very easy.  I recommend trying it if you need to make an infographic or a presentation.

Friday, July 18, 2014

Presentation without PowerPoint: Haiku Deck

Sometimes, as we teach, we want our kids, or our leaders to create something different than a PowerPoint, just to change things up.   PowerPoints and Google Slides are the old standby, of course, but if there is something else that is free and that makes it look nice and is easy, why not?

I learned from a colleague about Haiku Deck, a free app for iPad and a free account on the web that can be used to make dynamic and beautiful presentations. One of the reasons I like it is because the images you use are within the app and can be used without the risk of violating copyright.  It's also an easy program to introduce to students so they can build dynamic presentations for a class project.

I took about five minutes and build a slide show to use as a sample.  It autosaves and the images within the presentation are gorgeous.  A student or a teacher can create some very dynamic and beautiful presentations.

One thing to note; you cannot import your own images.  You can embed a chart with data but all the images you use come from within the app.  If you are doing a specific presentation, you may not be able to find all of the images you are looking for.   If you are looking for a different way to make a presentation, Haiku Deck is a free way to do so. The images alone are worth a stop to the site.


Tuesday, July 15, 2014

Simple ways to caption: Camtasia

If you are fortunate enough to have a copy of Camtasia from TechSmith, you can use that to make your videos accessible to all with captioning.  The software is about $300 for a copy, but, it's worth it. I have used it for several video projects and the outcome is very professional.

The people at Techsmith have established excellent tutorials for their product and there is a section devoted to captioning.  It has a speech to text capability, syncing with a script as well as manual caption editing.

Techsmith does have a free trial of the software to see how to use it and if you want to buy it. I encourage you to download it and make a video lesson. Don't forget your captions, they are a very important step to making a video accessible for students who need to read subtitles instead of just listening.

Friday, July 11, 2014

Simple ways to caption: iMovie

I have talked a few times lately about captioning video to make them accessible for all learners.   I am not a Mac user, but, iMovie is built into each Mac computer and it can be used to caption videos.   I saw it done at a conference recently, and it looked fairly simple to do.   Apple has made a whitepaper with directions on how to do this.  You can find one by clicking this link.

I think it is important to remember that all students need to be able to have accessible videos.  Not all students can learn my merely hearing, some need to read that is spoken to them.  Captioning is a simple step that will benefit your students.

iMovie does take a little longer to caption than using YouTube, but, it can be done prior to the upload and be built in directly to the video. One step that is different than editing captions in YouTube is the direct typing of word for word content.   YouTube does find the content for you and you just edit. With iMovie, you will have to type as you listen.  The steps are a little extra, but it is worth it in the end.

Tuesday, July 8, 2014

Simple ways to caption: Movie Maker

When it comes to accessibility, captioning is by far one of the best ways to make a flipped classroom an accessible classroom to many learners.   Microsoft Movie Maker has the capability of placing captions over video clips to help the visual learner.   I have located a tutorial on Microsoft's website that explains the process of using Movie Maker's title/ credit component. You merely place the credit over the video.  You can see the tutorial here.

I have used Movie Maker often for putting together tutorials for students and staff. It is an easy program to use and the fact that it is free makes it even better. It is available on every PC computer and if it doesn't appear, it can be downloaded to your Windows PC.  It isn't compatible with an IOs system.

There are several good tutorials for Movie Maker in general on YouTube as well.  It's worth looking into.


Tuesday, July 1, 2014

Simple ways to caption videos: YouTube

I recently went to a training for technology leadership certification and one of the things we talked about for a great amount of time was accessibility for all students. 
I've decided I'm going to take a little bit of time to talk about captioning because that is one of the ways to make things accessible for students.  There are so many teachers flipping their classes, but do they realize that not all kids can follow the aural cues and watch the video along side?   Some of them need to have their videos captioned because they learn better by reading than merely listening. I want to take a little time today to show you how to use YouTube to caption.  I have found this is one of the easiest ways to make it work. 

1. First of all, if you have a video uploaded to YouTube, captioning is simple.  Follow these steps:
1. Open your YouTube video manager where you see the list of YouTube videos.
2. Choose the video you plan to edit and click Subtitles and caption from the Edit pull down menu.
2. 3. Choose English as the original language of the video and it will regenerate a page that has the 4th image on it, When you click the English that has a green dot next to it, you will see a page of text generate.  This is your captioning.   
4.  You need to click the edit button and it will permit you to change the text to what it needs to be.  Sometimes, text is generated that doesn't make perfect sense, but with a few keystrokes, you can change it to make it correct.  Hearing impaired will tell you they need to just get the gist and not the entire context.  Another note:  You may want to add cues that relate to the sounds as well. (applause, music, laughter) as this helps the hearing impaired understand why there is no captioning for a long period of time.
5.  Once you have edited the text that came in, you merely publish it and then you will notice that the video has text the next time it is played.

This is a free service and really doesn't take that long to complete.  You will be able to help many students who learn better from words than audio.  It is a great way to meet the accessibility needs of all students.


Friday, June 27, 2014

Google Talk to Type on Blogger: It can be done

        I wanted to test and see if I could actually do a blog post in Blogger using Google Talk to Type. I was actually surprised to see that what I typed was what I said which tells me that this is another accessibility tool that teachers can be using with their students. 
        I can see it being used especially for students who have a lot of trouble writing and typing and getting their words across. There are some kids out there, who are able to talk and get the point across a lot better than type or write. Sometimes their handwriting is hard to read or they are physically unable to write as much due to a disability.
        If you, as a teacher, may decide to have your students do blog posts or do writing prompts of some sort you can actually set them up in Blogger to do this.  The students who have trouble sharing their thoughts and making them fluid could actually talk and then let it type what they have to say. I agree, it's possible, that you will have things that are little unorganized but you will actually have more content coming from the students when they talk to type.
       I can actually see this talk to type accessibility being used and a lot of different classrooms. If a student has trouble taking notes in a classroom, the teacher could use talk to type and let the student take notes that way and actually record word for word what the teacher says as a later tool to refer to when it comes to taking a test. This would work perfectly for those times when an instructional assistant is not available to go into the classroom with a special needs student. 
       The teacher can actually record himself or herself doing the notes and the special education student could refer to the notes with the resource room staff as a review.  One of the things we did discover, is that if you are using a foreign language this Google Talk to type does not work as well and it is very inaccurate. I would not recommend using it in a foreign language class as a way of helping students do better because what you're going to see come up is not actual factual information.
        I did have to go back to the actual post and edit a little, add punctuation and check the spelling of a few words before I was able to publish it, but, as a means of offering assitance to that kid who isn't a good writer or isn't a good speller, this is a fantastic tool. It can do a lot to help students study, review and assure they are taking good notes as well.  

Thursday, June 26, 2014

Recording Lessons for a Flipped Environment

If you are a teacher currently looking at the Flipped model or using it, I had an aha moment today I have to share with you.  My French students were learning verb families today.  I have tried several different things to show them the notes on the screen.   I have used paper, a doc camera and projector.  I have used the laptop and connected it to the television.  I am finding that not all of these methods give me the chance to record and show again so kids can go back and relearn if they didn't get it.  Mind you, verb families are easy, but there is an occasional student who needs to see the step by step.
I have an iPad so I used an app called show me. (P.S. it's not my favorite. I was in experiment mode. Show me only allows one page per session. I can't write that small.) I think I will use educreations in the future. As I go back to my story, I linked my iPad to the television with a vga cord.  I wrote right on the device and my notes were there. My aha moment came when  I decided after the fact that I can record that lesson with the program and share it with the kids. Perfect start of a flipped class.
In the future I will be using these apps and recording my lessons as I teach them. I think the kids will really appreciate the availability of the tutorials later.

Tuesday, June 24, 2014

Reaching all learners

Not all students are created equal.  I was reminded this last week at my TLC cohort training.   (Technology Leadership Certification).  Part of the training involved a group from Indiana that focuses on students with disabilities both physically and mentally.  Some of the kids they deal with are blind, deaf, learning disabled.   It helped me realize the need for modified and differentiated instruction to reach all kids.  The presenters shared with us several tools that we can use to help us reach the learners. Some things are way cool and I never expected how easy they are to do.

For starters, if you are using your phone and have a document open in google, you can talk right into the document and it will sync.   iPhones definitely work and android phones that have Google Keyboard or voice to text installed on them let it work.  It might use data plans, but, if you have a student who is learning disabled, you can have them create a doc for notes and you can record your lesson right onto the doc for them for later reference. Isn't that an easy way to help kids be more successful?   One thing to note, you will have to be in a BYOD school or have a policy in place that permits kids to access a wireless network at school.  (Maybe even a guest network that students can access that gives them limited permissions.)

Another thing to remember is captioning videos.  If you are going to flip your class, caption your lesson.  If you upload your lesson to YouTube, it will auto caption for you, but you will have to edit it to assure it is the right information.   You can also use the free software on your computer, iMovie or Movie Maker, depending if you are on PC or Mac. Either way, that simple step, which through YouTube takes only a little extra time will help that student in need of text be more successful.  It's hard to watch a video if only audio is present.  Some learners need just a little more help, and that could be a caption.

The next few posts I do will provide a few tools that can be added very simply to your computer or to Chrome to help make a learner's life a lot easier.  Check back for more.

Thursday, June 12, 2014

Summer PD

Summer vacation has started and I am ready to go full swing into my own personal PD.  I have talked about personalized PD frequently lately. This summer is no different.  My goal is to spend at least one day a week working on PD so I can share things with my staff.  I am almost done with my TLC training to become a technology coach.  I have even established a website to send them to for tips and techniques.  I am hoping my experiences will better their experience with 1:1 learning and web 2.0.

In my TLC training, I have been asked to visit the Digital learning day blog created by the Indiana DOE.  It's a month of guest bloggers who write about a tool.  I have been challenged to try a tool and do my own blog post about how it would benefit me and also evaluate it for the SAMR model.  I think I am going to spend a little more time focusing on that challenge and come up with several tools.  While I may not go so indepth as to evaluate the SAMR component, I am going to find some tools and share them with my readers.  

That is my summer plan.  Let's get started on summer vacation and personalized PD.

Tuesday, May 20, 2014

Keeping a collection Fresh: My annual Weeding

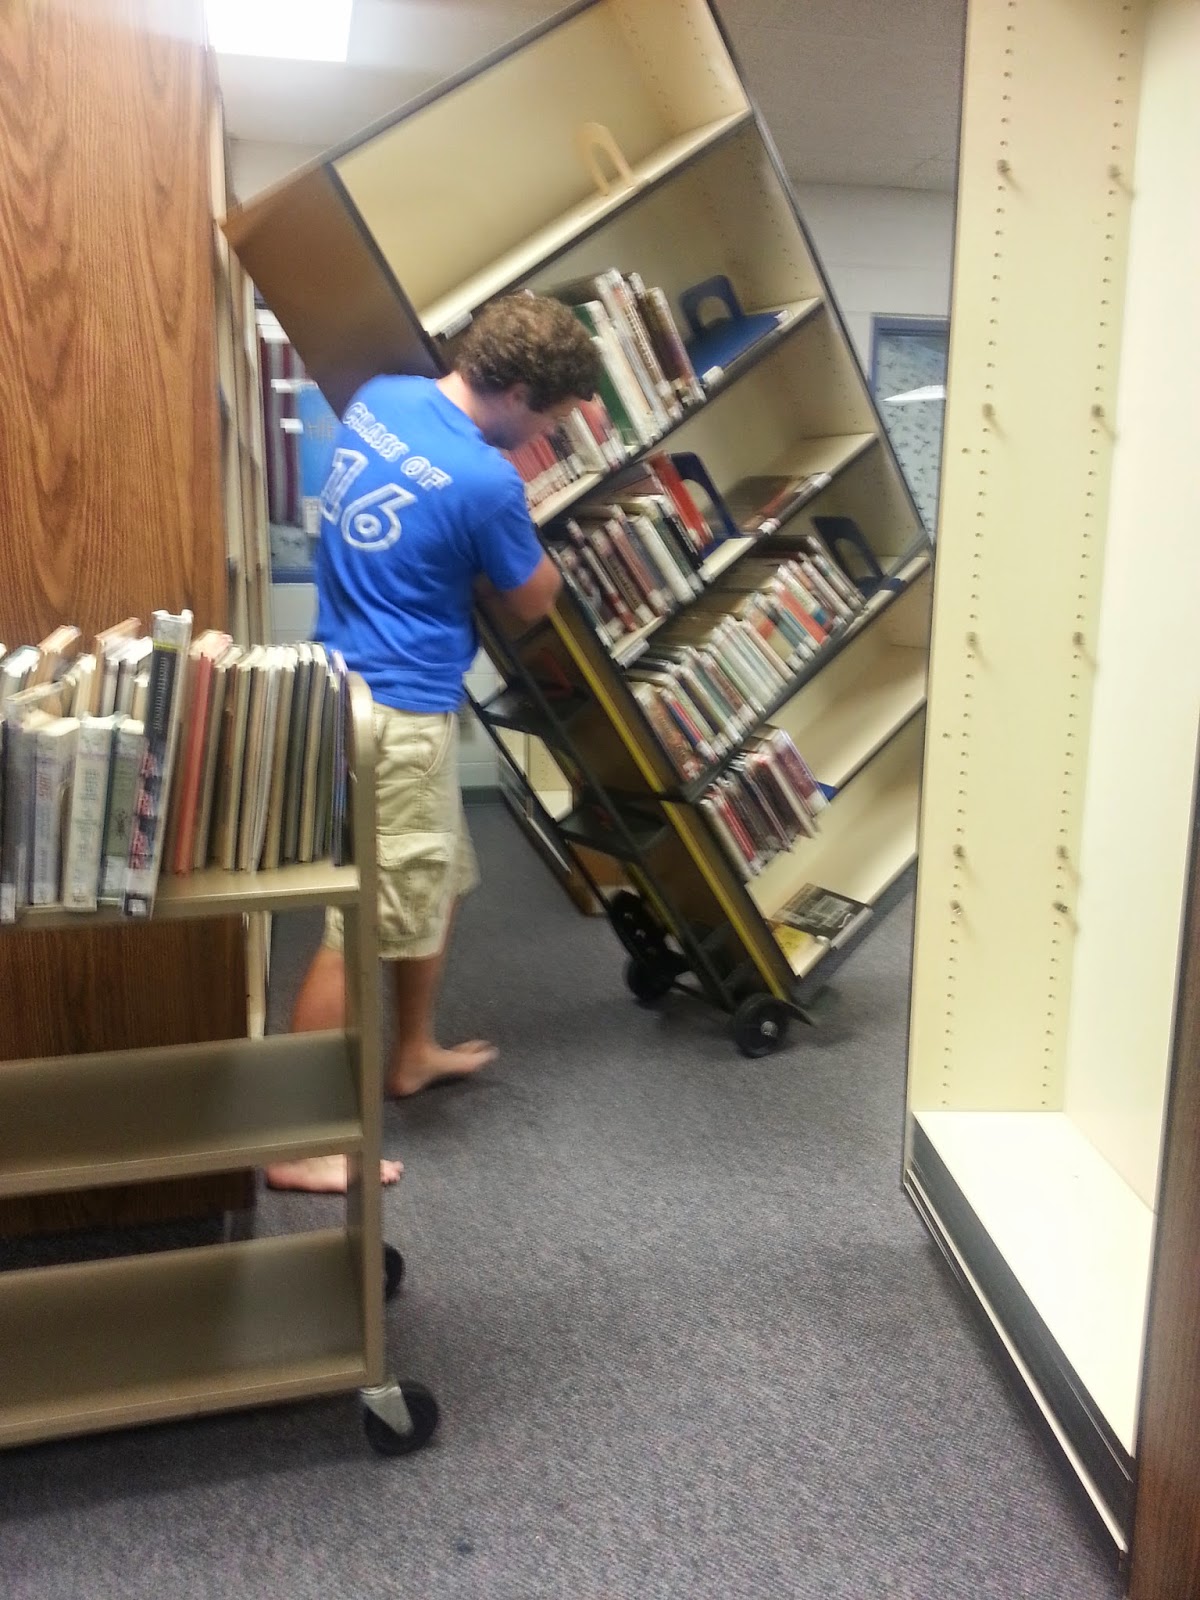
About two weeks ago, my assistant and I decided it was time to start our yearly book weeding session. It is such a long process, but we know that the final outcome is best for kids and the library.

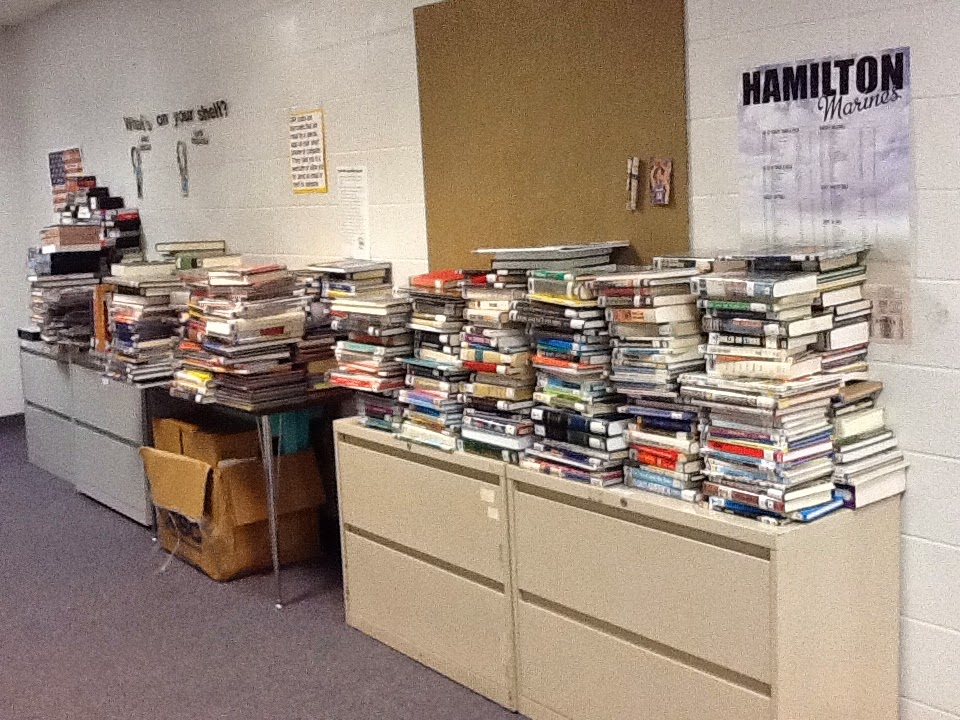
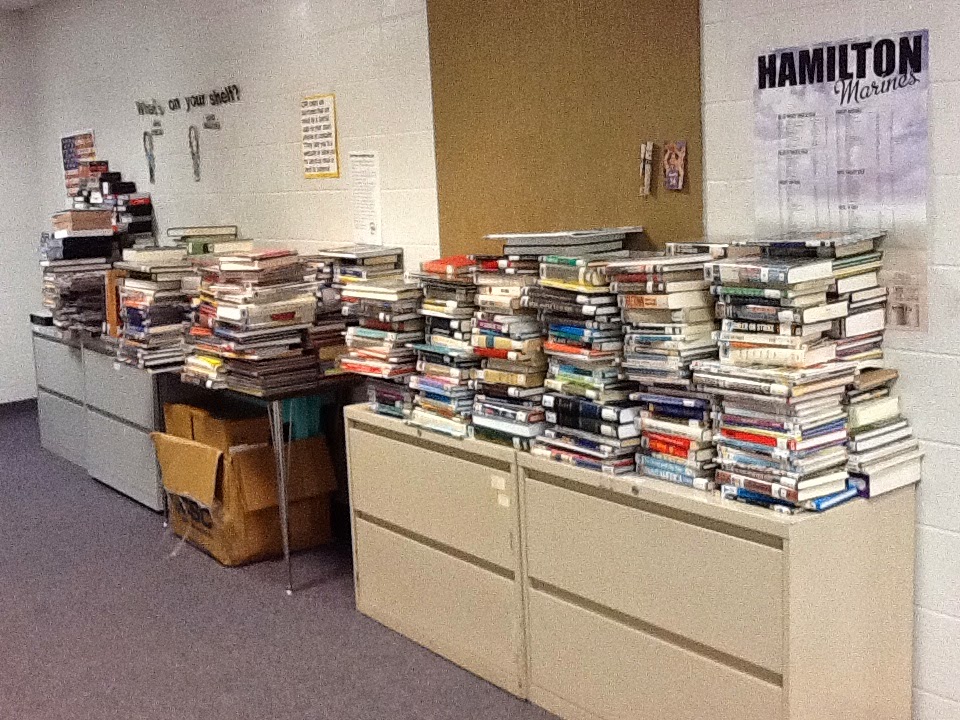
Our plan was to clear out some books that hadn't circulated since I took over in 2010, even after we moved them and reorganized the collection.  We found over 600 books have sat on shelves, collecting dust and getting more and more outdated.  We did a lot of evaluating and discussing to decide what to do.    We decided after a lot of thought and discussion that weeding was the ultimate conclusion.

I hate getting rid of books.  I am a book hoarder.  Upon a visit to my house, it is evident, but, sometimes, getting rid of a book is the best thing for it, especially if the topics are so antiquated that they are useless to keep.  It is hard to write an accurate research paper with a book that talks about information relevant in 1995, as many of my science books were.


With our 
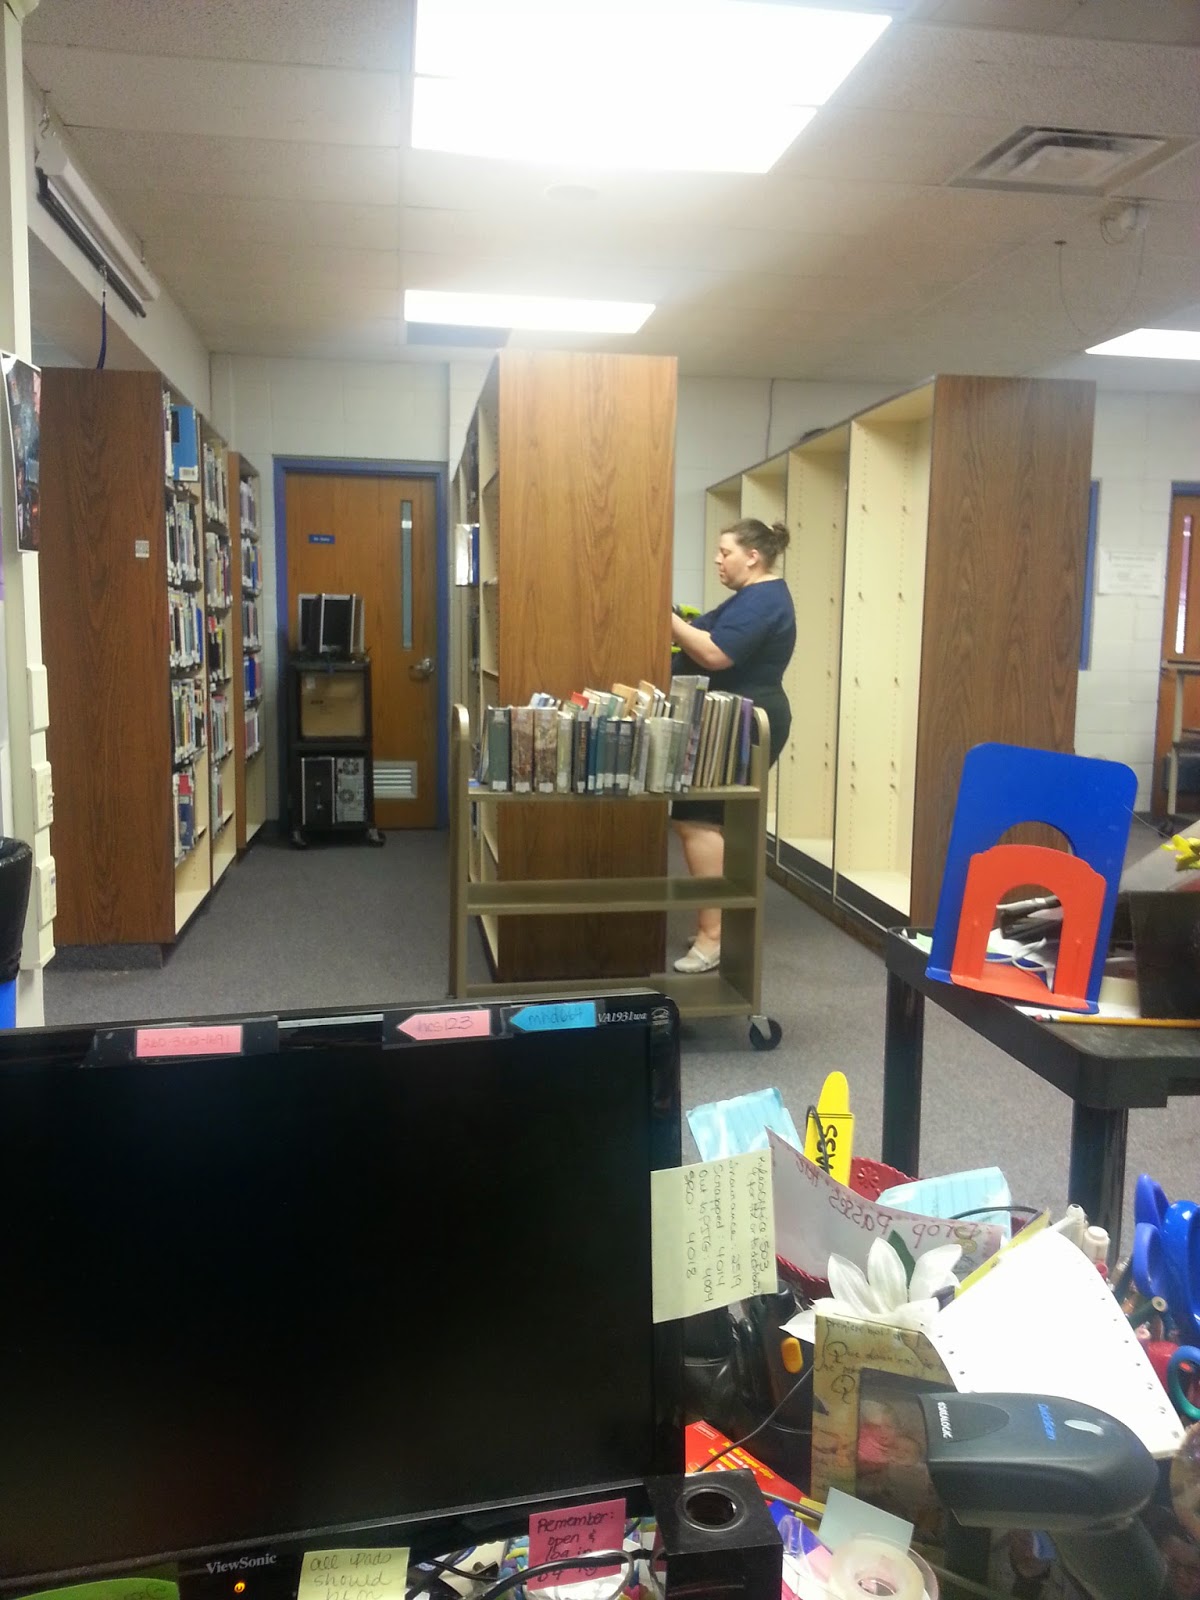
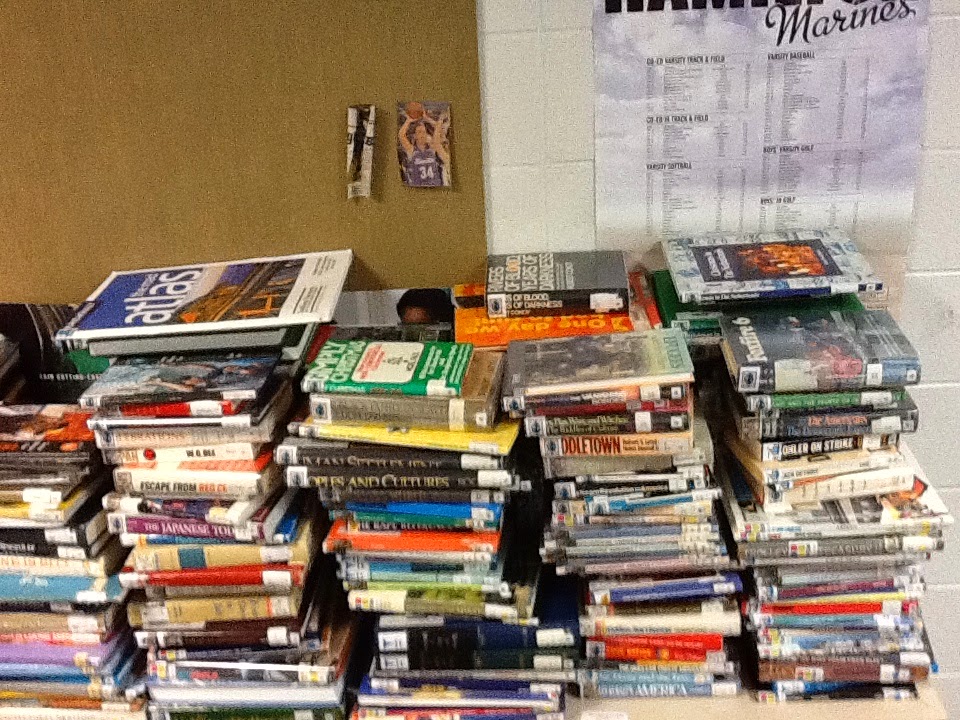
weeding, we focused heavily on the Science, Health and Geography books and VCR tapes (yes, I had a huge collection of these) after all, who needs a book about Burma when it hasn't existed in ages.  We looked at our historical books and political books and determined what was available online via databases and more current sites.   Our method to weeding is probably typical of most districts, but, I did a few things a little differently.  I asked the staff.


We have a few teachers who require students to have book sources for their research papers.  I relied heavily on these folks, as they know what their students need.  I invited them in, handed them a cart and asked them to pull unneeded materials.  I got a lot of response from them.  I also had several come to me telling me they would take the copies to their room as a reference.

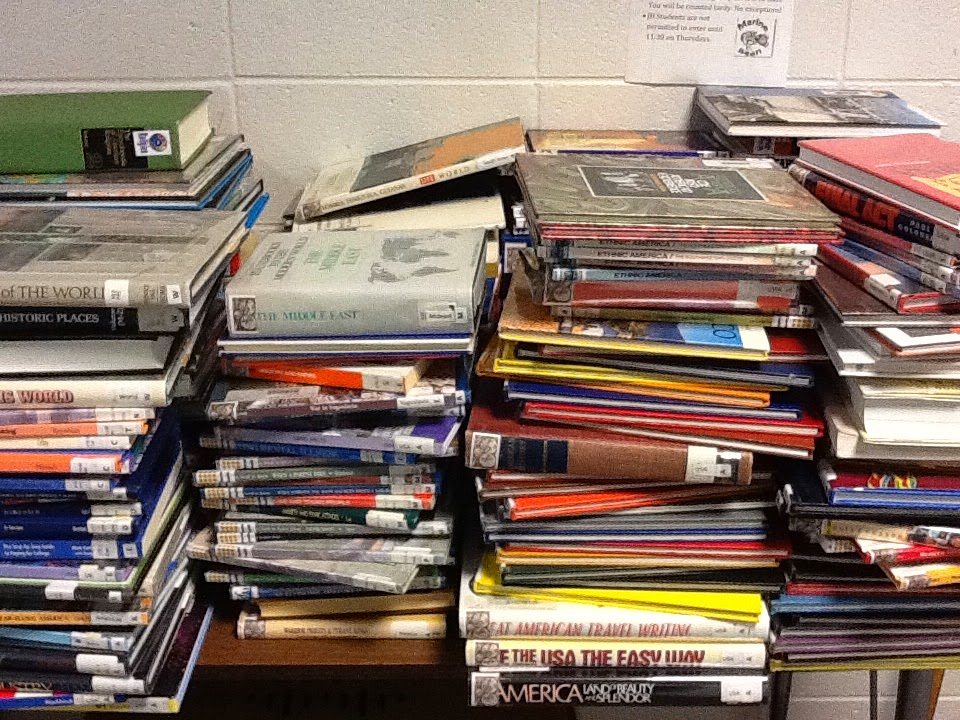
Despite my efforts of encouraging staff to use other sources, I still see a few of our teachers rely heavily on books, even if the material is outdated. We decided that history doesn't change, much.  We didn't weed much unless we have multiple books on the same topic and some of them were in bad condition.

The exciting thing is, teachers came in after I announced the weeding and started grabbing books for their classrooms that have been sitting in the library, unused, for four years. What do we do with the balance?  We donate them.  One of my former students is at a very low funded school with a 98% free and reduced rate.  I am going to let him look at them.  I also send some to a program founded by that same student called Refugees Read.  It ships books to African countries and builds libraries.


Friday, May 16, 2014

Data collection in the library

I have been in the library for four school years now and I am pleased with what I have done, but I came to realize after I attended the TLCHAT virtual cafe last week that there is one component I am not focusing on that I need to:  Data collection.

I learned a lot at the virtual cafe, and it inspired me to start collecting data.  One gal actually has a google form she fills out every day, a journal of sorts that logs what happened, numbers, circulation records and the good and the bad.  I decided to take that idea and put together my own document that will help me journal the day.   I decided I needed to get into the habit of doing it right away, so I can get myself and my staff trained to keep the data.  I have been keeping track of student comings and goings since Christmas time, I generated a google form they fill out when they come in, and I get the names of the kids, their reason and the teacher.  It has come in handy when a plethora of children suddenly arrive unannounced.  I can go to the teacher and remind them to give me a heads up, etc.  It also helps me see the why for the visit.

The main problem with the form is the data it generates.  There is so much information that figuring out what I need is a challenge.  I think the daily form with the number of kids in, circulation records and such is going to be my push.  I am envisioning a monthly data report, even posting the data once a month on the school library blog. I think if people see what is happening and why, maybe it will impact funding, support keeping an aid, support my goal for a shift from a media center to a learning commons, and help me get the grants I want.  I never realized how important the data collection is.  I am seeing a definite need to keep track and to generate charts and such with the data I collect.

I suspect I will find the time I put into data collection will help me a great deal with my numerous causes and needs.


Tuesday, May 13, 2014

Personalized PD: Finding webinars

As I spend a little time talking about personalized PD, it is only appropriate to share the concept of the webinar as a way to grow professionally.  Over the past few years, webinars have become one of the fastest ways of learning material and personalizing what is learned.  There is a lot of picking and choosing and a lot of options for many different content areas, grades and educators.

I have found several fantastic sites that offer PD webinars.  Some sites charge a fee to be a member, but they have free sessions from time to time. I do those free days like they are going out of style. My kids make fun of me because I am doing another webinar.  But, some of them are outstanding.   I have found a lot of good tools on the simplek12 website as well as edweb.net.   Both do webinars often and all of them have been great quality.  I have learned a lot of new things through both.

I have also found several archived unconferences with webinars too. (An unconference is a virtual conference where people all over the globe get together and go over various topics.  I have seen some through teacher2.0 and library2.0.  A few conferences have been archived, you just have to search for them.  They are all over the internet.

I recommend looking into these free webinars if you want to personalize PD for yourself.  It is very possible to customize what you want to learn.  I do a lot over the summer so when I go back to school I am fresh and ready to go.  I have taken a lot of information from these webinars and used them in my classroom, library and with colleagues.